Feeds:
Posts
Comments

Vanilla extract never looked sooooo good!

I am bringing vanilla extract back to its American roots with good old Kentucky bourbon! After many months of waiting my new infusion is ready! I was inspired by a friend of mine at my nail salon who told me that her grandmother would make her own vanilla extract with bourbon. I had always used vodka but was curious as to what a rich Kentucky bourbon would add. So I went to the liquor store, bought a handle of Jim Beam and ordered my imported Madagascar vanilla beans. At first I was a bit scared of the intense flavor of bourbon and thought it may over power the vanilla but boy was I wrong!

I can honestly say that this is my new favorite extract! The bourbon complements the vanilla beans soooo well and the flavor is orgasmic. Yes, I said it, orgasmic! The smell is intoxicating (in a delicious way) and really makes cookies, cakes, pies, etc. taste just that much better! As you will begin to see in my future posts 🙂

I have just listed this wonderful concoction on my esty shop . Check it out and give it a try. Trust me you will never buy store-bought again!


Almond Flax Crackers

It may have seemed as if I fell off the face of the earth but that’s not the case. I have been super busy with school and life but have managed to document som culinary adventures in between!

I first came across Elana’s pantry a few months ago an instantly became infatuated! I love how she uses unique ingredients such as almond flour and coconut flour in her recipes. I have even ordered her books on amazon (one is pre-ordered). I find them inspiring and creative.

I do not have a big sweet tooth but am a crunch-a-holic! I am addicted to crunchy things such as crackers, nuts, and more crackers!I was intrigued when I came across her recipe for crackers made with almond flour. I had recently purchased a bulk sized bag of almond flour on amazon and was ready to experiment. I have made nut crackers before but mainly with fine ground nuts and salt. They always come out chewy not crunchy. So I think almond flour is the key!

I also wanted to remove the egg and replace it with my favorite flaxseed mixture (1 TBS plus 3 TBS hot water). Also, I had some pumpkin seeds lying around and figures I could use some added nutrients! (pumpkin seeds are high in magnesium, iron, and zinc)!

So this is what I did:

  • 2 cups almond flour/meal
  • 1/2 tsp sea salt
  • 1 TBS flaxseed meal plus 3 TBS hot water…let it set for about 3 mins before adding it
  • 1/3 cup raw pumpkin seeds
  • 1 TBS olive oil

Preheat oven to 350 degrees.

Combine flour and salt.

Add in flaxseed mixture, pumpkin seeds, and oil.

Blend and shape into two balls.

Place each ball on a cookie sheet (lined with parchment) and roll into a thin layer (the thinner the more crunchy the cracker).

Score into squares with a knife or pizza cutter. Sprinkle with sea salt.

Bake for about 15 minutes or until golden brown.
Cool then cut/break apart.

Ready for the oven

15 minutes later…

It's hard not to eat them all!!

As I have previously posted I have a shop on etsy.com in which I sell my vanilla infusions. Some of my best sellers are my homemade Madagascar Vanilla extract and Vanilla Bean Sugar. I of course am a big fan of my products and use them everyday, specifically in my coffee. Every morning I add a spoonful of my vanilla bean sugar and a splash of my vanilla extract into my unsweetened coconut creamer. So the other day I thought, why not combined the two?!

I remember watching an episode of the new Spice show on Food Network in which she made vanilla cubes. So I looked up the recipe and started my experimentation. Here 

Vanilla Bean Sugar Cubes

  • 3 cups of my Vanilla Sugar
  • 1/4 cup my Vanilla extract
  1. Pre Heat oven to 275 degrees
  2. In a large bowl, mix sugar and extract until completely incorporated. (looks like dough)
  3. Pour into an 8 x 8 baking dish
  4. Score with a knife into 1/2 inch by 1/2 inch squares
  5. Bake for 1 1/2 hours
  6. Remove and cool
  7. Once cooled, invert onto cookie sheet and break apart

Ready to go in the oven

*** I had a little trouble with having the cubes come out properly but that may be because my impatient self didn’t let them cool enough before inverting them. Also, next time I may use parchment paper.

Finished product…

Vanilla Bean Sugar Cubes

On sale now…

Find it here

I used some this morning in my coffee and am sooooo happy I made these! They impart such a concentrated vanilla flavor!

Low carb never looked sooooo good!

To all those who are watching their carbs, I dedicate this post to you! I have started planning my menu for my baking business www.littleflourbakeshop.com and wanted to include a low carb cupcake. I do not believe in extreme animal protein/fat dieting (aka Atkins) due to the overload of “bad fats” and ketosis inducing amounts of protein. However, I do believe that watching your carbohydrate intake does work for many and can also a bit limiting. I want my bakeshop to cater to ALL specialty diets as well as those that want the good old classically sweet and decadent cupcakes. I have the classic, vegan, and gluten-free cupcakes pretty much tweaked to my perfection so it was time to tackle the daunting task of the low carb cupcake.

So I looked in my pantry to see what I had on hand that fell into the low carb catagory. I stumbled upon some coconut flour I had baught from my local natural food store. Then that made me grab my coconut oil. So with coconut flour and oil in hand I searched the web for some ideas.

Elana’s pantry was my first go to site. I know she is an expert in baking with coconut flour and has even written a few books, such as Gluten-Free Cupcakes: 50 Irresistible Recipes Made with Almond and Coconut Flour.

So I took her recipe and tweaked it with what I wanted to use/had on hand. Since this was a testing session I cut the recipe in half in order to make only 6 testers.

So here is what I came up with

Low Carb Vanilla Cupcakes with Chocolate Frosting

(makes 6 but can double to make 12 cupcakes)

1/4 cup coconut flour, sifted

1/4 tsp sea salt

1/8 tsp baking soda

3 eggs, room temp

1/4 cup coconut oil, melted if in solid state

1/4 cup agave nectar

1/2 Tbs vanilla extract

1/2 vanilla bean, scrapped

Pre heat the oven to 350 degrees.

1. Sift coconut flour, sea salt, and baking soda in a large bowl and set aside.

2. In another bowl, beat 3 eggs. Add melted coconut oil, vanilla extract, vanilla seed scrapings, and agave. Mix well until well combined.

3. Add wet ingredients into dry ingredients just until smooth.

4. Place 1/4 cup of the mixture into the cupcake pan with lightly oiled liners.

5. Bake for 20 minutes.

6. Cool completely

Out of the oven and looking good!

Chocolate Frosting

Adapted from here

1/2 cup semi-sweet chocolate chips

1/4 cup coconut oil

1/2 Tbs vanilla extract

1. Mix chocolate chips with coconut oil and melt over a double boiler (or in the microwave) until smooth.

2. Add in the vanilla extract and mix well.

3. Freeze for about 10 minutes.

4. Then using an electric mixer, beat until fluffy.

5. Frost away!

So what did I end up with…

Think mounds candy bar meets cupcake on a low carb day!

As for taste, it really taste like a Mounds candy bar. The texture is moist and with a nice crumb for a low carb cupcake. I think I will experiment a bit more with this recipe and maybe add in some almond flour (need to buy. All and all it was a success and can’t wait to perfect the low carb cupcake!

Making the dream happen… Little Flour Bakeshop is opening its oven to bake up delicious homemade cupcakes (more to come as we expand). Baking is my creative outlet and ever since I was little I have loved to bake. Heck, my favorite toy was the easy bake oven. What started from a little box that cooked with a light bulb, then became my summer break cake baking and decorating adventures. I took a little bit of a hiatus from baking when I was at Florida State University for my undergraduate degree. Once I moved beck to South Florida I started baking for the holidays and birthdays. Then I started focusing on cupcakes…I got hooked! What is better than a moist little piece of heaven topped with a decadent cloud of frosting…yum! So my obsession began. I started baking cupcakes for any reason. I love to make cupcakes for no reason at all. It is my stress reliever and makes me smile.

I love to create different flavors and combinations. I also enjoy recreating the classics into diet specific treats that taste just as good if not better. I feel those who have to give up certain foods shouldn’t have to give up on enjoying a delicious cupcake. My friends and family rave about my cupcakes and have always told me to open up a business.

 So just recently I decided that I would take my passion for baking to the next level. I knew I wanted to create a website but needed a name. I held a contest on facebook that offered an order of cupcakes to the person who came up with the best name. I was excited to see such creative minds in my family and friends. After days of contemplation and checking domain availability, I went with Little Flour Bakeshop. And the winner of a delicious batch of cupcakes…my MOM! I guess creativity runs in the family.

Now it was time to make a logo and create a business plan. Thank God for photoshop and my boyfriend Cary! After a couple of days and many ideas later, we came up with this:

So what will be our business plan…specializing in moist and flavorful cupcakes made with the best ingredients and of course, lots of love! We also make organic, vegan, and gluten-free options. We serve most of South Florida with both delivery and pick-up options.

Check us out on facebook!

So what will you expect to see on my blog…lots of cupcake recipe testing!!!!!!

Whole Wheat Orzo with Roasted Vegetables and Shrimp

It was the beginning of the week and my fridge was pretty much bare. I get my organic share this week and didn’t want to waste my money at the supermarket. So I went for a hunt in my freezer and pantry to see what I had on hand. If there is one thing I do best it’s stocking the pantry! I have a grocery shopping addiction! Every time I go to whole foods or the local health food store I always find cool and interesting new products to try. I could spend hours just going up and down the aisle. I love taking my time and looking at every ingredient/nutrition label. On a side note, the FDA allows a 30% range of error on the nutrition label. I wont get started on that topic but just so you know don’t always believe what you read on those labels. That’s why I look at the ingredient list for highly processed ingredients and unnatural additions. This is why my boyfriend refuses to go with me.

As I scattered my pantry I found some organic whole wheat orzo. I remember buying this at whole foods and thinking I haven’t seen this anywhere else! So I thought, let’s try that tonight!. Then I looked in my freezer and found some frozen shrimp that I totally forgot about! But just shrimp and orzo?? I need veggies badly! About the time I was about ready to give in and go to the market, my mom called to tell me to come by and pick up the box I had mailed to her house. So I thought, well I ‘ll go raid her fridge!

My mom always buys more than her and my stepdad need. (I guess that’s where I get it from). She had made a trip to Costco and stocked up on plenty of veggies. So I told her about my dinner dilemma and she suggested I take some. So I did!  I LOVE MY MOM!

Back at my house I laid out the veggies I got from my mom…zuccinni, asparagus, red onions, and yellow squash. First thing that came to mind…roasted vegetables! So I started chopping.

Roasted vegetables

Preheat oven to 425. Mix the cut veggies with some olive oil, sea salt, pepper, and some dried parsley and oregano. Lay them out on a cookie sheet lined with aluminum foil and bake for about an hour.

Ready to go in the oven

A closer look...

While the veggies are roasting prep your shrimp (mine were already cleaned and deveined). I put some olive oil in a large saute pan and turned the heat to very low. I sliced three cloves of garlic and placed it in the oil. This way the garlic cooks very slowly and infuses the oil with tons of garlic flavor.

My cooking companion feel asleep!

Once the veggies were almost done I started a pot of water on the stove and started to cook my orzo.

The veggies are done!

The garlic has become soft and the oil fragrant. I turned the heat up to medium high and added the shrimp. After a minute, I added a splash of white wine and the juice of half a lemon. Saute for a few minutes or until the shrimp are pink. Turn the heat off and add your fresh parsley.

Drain the orzo and place in a large bowl. Add the shrimp and roasted vegetables, and mix together. Viola!

Ready to eat!

Ingredients list:

1/2 lb of frozen shrimp, thawed

1 1/4 Cup of whole wheat orzo (varies on the amount you wish to have)

Roasted veggies (see above)

3 garlic cloves, sliced

Olive oil

~1/4 cup white wine

Juice of half a lemon

Handful of fresh parsley

Sea salt and pepper

Salt-n-Vinegar Kale Chips

Salt-n-Vinager Kale Chips YUM!

When I was younger I was obsessed with Salt-n-Vinegar potato chips!  I don’t have much of a sweet tooth but I do love salty and crunchy! Seeing as if I am not much into potato chips anymore I needed a way to get my fix! I looked in my fridge and saw that all I had remaining from last weeks organic share was kale, carrots, and grapefruit. Well grapefruit was out of the question and carrots don’t really get crispy. So kale it is!

Some nutrition facts about kale…

Kale: is an excellent source of vitamins A, K, and C as well as fiber. Not to mention it contains a large amounts of sulforaphane and isothiocyanates which promote liver detoxification. Kale is also a great source of antioxidants, including carotenoids, lutein, and zeaxanthin. All and all kale is a powerful food that is easy on the waist…only 36 calories per 1 cup cooked!!!

I have made kale chips in my dehydrator before but that takes about 14 hours. My craving couldn’t wait that long. So I preheated my oven and got to cleaning my kale.

Salt-n-Vinegar Kale Chips

  • 1 bunch of Kale, washed and stems removed
  • 1-2 Tbs apple cider vinegar
  • 1-2 Tbs olive oil
  • sea salt and pepper

Directions:

  1. Pre-heat oven to 300 degrees
  2. Cut prepared kale into medium-sized pieces and place in a ziplock bag
  3. Mix together vinegar, salt and pepper, and olive oil. (I say 1-2 Tbs depending on the amount of kale you have and your taste preference)
  4. Add mixture into plastic bag and shake until kale is coated
  5. Bake for about 30 minutes (stir halfway)

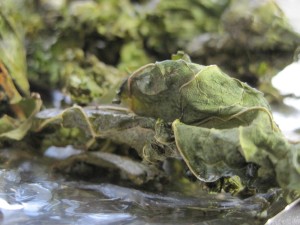
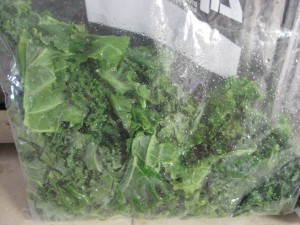
An easy way to distribute the oil and vinegar

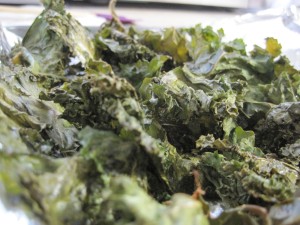
Ready for the oven

Crunchy, salty, and tangy!

Time to Detox!

It’s that time of year again! After months of overindulgence and a few pounds later, it’s time to detox! I have never been one to go on a crazy juice diet or cranberry water only diet. If you eat a diet rich in vegetables then you can naturally rid your body of the pounds!

I belong to Annies organic Buying club which provides organic produce to those in Florida. I am sure each state has their own and I would highly recommend you look into it. Every two weeks I get a full box of fresh seasonal produce that is ten times better than any you can find in a supermarket. Most of the time the supermarket (and yes I mean whole foods as well) doesn’t even carry what you can get from annies. Each week that create themes that correspond to the contents of the boxes. This week was a detox themed share, including, broccoli, ginger, celery, daikon radishes, carrots, kale, rainbow chard, blueberries, grapefruit, etc…Who needs a nasty detox supplement when you have nature’s finest available!

Fridge full of organic produce!

Everything we eat is broken down into micronutrients that help (or hinder) bodily functions. Some foods such as refined and processed foods are broken down into toxic substances that do more harm. On the other hand fresh vegetables and fruit are the miracle workers of the food pyramid!

Let’s take a look at how produce can help:

Broccoli:  Broccoli is full of antioxidants such as vitamin C, carotenoids, lutien, zeaxanthins. Also, a great source of heart heathy folate and fiber. But for the purpose of detoxification, it contains one of the largest sources of sulfur compounds, such as sulforaphanes and isothiocyanates. These increase the ability of the liver to detoxify toxic substances. All these wonderful and healthy attributes come at a low-calorie cost of 44 calories per one cup cooked broccoli!!!! What a deal!

Ginger: contains natural anti-inflammatory nutrients (gingerols) that also soothe the stomach and relieve nausea. And only 20 calories per 1 ounce!

Celery: is more than a side dish for wings! Is an excellent source of vitamin K and C. Rich source of antioxidants, such as coumarins, which promote a healthy immune system and helps rid the body of harmful substances. Other antioxidants found in celery are pthalides, which help lower blood pressure. And to top it off..only 19 calories per cup!

These sound like a perfect way to detox! So how do I get all these powerful antioxidants in one meal…make a soup!

Detox Soup

1 small onion, chopped

2 cloves of garlic, peeled and chopped

3-4 ribs of celery, chopped

1 inch piece of ginger, peeled and chopped

2 daikon radishes, peeled and chopped (can substitute any root vegetable)

2-3 large heads of broccoli, trimmed and chopped

~4 cups of vegetable broth (may use water)

1 tsp dried parsley (didn’t have fresh)

sea salt and pepper

Directions:

  • In a large soup pot, saute onions, garlic, celery, daikon, and garlic in olive oil (~1 tbs).
  • Then add ginger and broccoli, sauté for another minute.
  • Add broth (enough to cover veggies), parsley, and salt and pepper.
  • Simmer for about 20 minutes or until veggies are soft.
  • Then transfer (in small batches) in the blender. Can use an emersion blender but sadly I don’t have one!
  • Blend until smooth.

Detox soup in my favorite owl mug!

Detox never tasted soooo good! Reminds me of an asian ginger broccoli dish but much healthier!

You'd be wise to eat this soup 🙂

I had a few more vanilla beans to use up so I decided to reinvent the classic vanilla cupcake. First I made a vanilla bean caramel sauce. I would love to post it but I forgot where I put the piece of paper in which I wrote my recipe and notes on 😦 I promise once I find it to post it. But I do believe it was just a simple caramel sauce recipe in which I swapped a vanilla bean for vanilla extract and used honey instead of corn syrup. (One thing you will notice about my recipes is I prefer not to use refined products when I have natural available)

Anyway, once the caramel was made I let it cool and began with the cupcakes!

(I made them mini but you can make them regular sized with a cooking time of 20-25 minutes. Also, my oven is from the 60’s and cooks at superpower heat so my cooking time are normally shorter than most.)

Vanilla Bean Cupcakes:

(makes 24 regular sized and ~50 mini cupcakes)

2 3/4 cups cake flour
1 tsp baking powder
1/2 tsp baking soda
1/2 tsp salt
3 large eggs
2 cups sugar
1 cup canola oil
2 tsp pure vanilla extract plus 1 vanilla bean, scraped*
1 cup sour cream

Preheat oven to 350 degrees. Place liners in cupcake/muffin pans.

Sift the flour, baking powder, baking soda, and salt into a medium bowl and set aside.

In  a large bowl, beat the eggs and sugar until thickened and light in color, ~ 2 minutes.

Mix in the oil, vanilla extract, and vanilla bean contents. Then mix in the sour cream until well blended.

Mix in the flour mixture until it’s incorporated and the batter is smooth.

Pour into prepared cups and bake 20 minutes for regular size and 10 minutes for mini-cupcakes, until toothpick inserted in center comes out clean. Remove from oven and let sit in pan for 10 minutes. Remove from pan and completely before frosting.

*Place leftover vanilla bean pods in your sugar to make vanilla sugar.


Soooo Cute!

  Caramel Buttercream:

1 stick of unsalted butter, at room temp

 1 stick of salted butter, at room temp

 2-4 cups of powdered sugar (I used around 4 cups)

1/4 cup of vanilla bean caramel sauce, room temp (any caramel sauce will do)

Beat butter until light and fluffy. Add half of the sugar and mix well. Then add caramel sauce. Continue adding sugar until desired consistency.

Spread or pipe onto cupcakes and drizzle a little extra caramel on top!

Cupcakes for everyone!

Inspired by Vanilla!

Every October I come up with my plan for homemade Christmas gifts. Last year it was infused vodkas and homemade bath salts. This year I was  inspired by Vanilla! It all started when I came across an excellent resource for imported vanilla beans from Madagascar. http://www.amazon.com/gp/product/B000CPZSC8/ref=ord_cart_shr?ie=UTF8&m=ASBG6UVTMWDAY

I have made vanilla infused vodka so why not homemade vanilla extract! So I used my techniques (vanilla beans + high-proof vodka+ time)  for infusing vodka to start my extract infusions. And the end results…

Now to make it gift worthy I need labels. So I went to customelabels.com and created personalized labels. These labels added a professional like quality that inspired me to sell them on etsy.com. http://www.etsy.com/shop/madetobeunique

My homemade vanilla extract

I have sold 2 products so far and will be trying new infusions (i.e. Bourban Vanilla Extract) 🙂

Well I had some leftover vanilla beans and decided to try my hand at vanilla infused organic sugar!

Organic vanilla sugar

So how did my family and friends react…THEY LOVED THEM! I have used both the extract and sugar to make most of my Christmas treats and I continue to be INSPIRED BY VANILLA!

You can find them on etsy: http://www.etsy.com/shop/madetobeunique